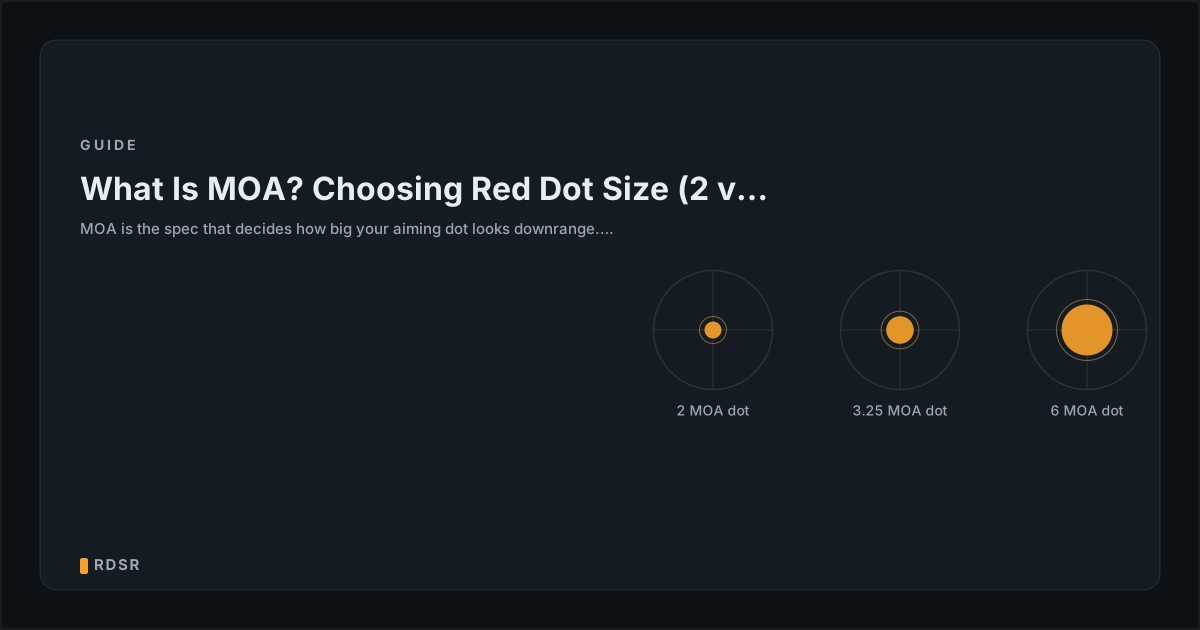
You are shopping for a red dot sight and every product page throws a number at you: 2 MOA, 3.25 MOA, 6 MOA. It is the one spec that confuses new buyers more than any other, and it quietly shapes how the optic shoots. Pick wrong and you either fight to find the dot on a fast draw or you blot out a small target you are trying to hit at distance.
The good news is that the concept behind that number is simple once you see the math, and the buying decision comes down to a single trade-off: speed versus precision. In this guide we will define what MOA actually means, show how dot size scales with distance using real numbers, and give you clear pistol and rifle recommendations, plus how dot size plays with magnifiers and astigmatism.
What MOA means
MOA stands for Minute of Angle. It is an angular measurement, not a fixed length. A full circle has 360 degrees, and each degree is divided into 60 minutes, so one MOA is 1/60th of one degree. Because it is an angle, the patch of target it covers grows the farther away you are, the same way a flashlight beam widens as it travels.
Here is the number worth memorizing: one MOA covers 1.047 inches at 100 yards. Most people round that to “about an inch at 100 yards,” which is close enough for the field. The exact figure comes from geometry: the circumference of a circle with a 100-yard radius, divided by the 21,600 minutes in a full circle, works out to 1.047 inches per minute. So when a sight is rated at 2 MOA, the aiming dot you see covers roughly 2 inches of target at 100 yards. A 6 MOA dot covers roughly 6 inches at the same distance.
That rating describes the apparent size of the dot itself: how much of your target the glowing dot will hide. It does not change the accuracy of the gun; it changes how precisely you can place your aim and how quickly your eye finds the dot. Hold that distinction and the rest of this guide falls into place.
How dot size translates at distance
Because MOA is angular, dot coverage scales linearly with range. Halve the distance and you halve the inches covered; double the distance and you double them. The math is just 1.047 x (yards / 100) x MOA. That single formula tells you everything about why dot size matters for your particular shooting.
Here is what every common dot size covers, in inches of target, across the distances shooters actually use:
| Distance | 1 MOA | 2 MOA | 3.25 MOA | 6 MOA | 9 MOA |
|---|---|---|---|---|---|
| 7 yards | 0.1” | 0.1” | 0.2” | 0.4” | 0.7” |
| 10 yards | 0.1” | 0.2” | 0.3” | 0.6” | 0.9” |
| 15 yards | 0.2” | 0.3” | 0.5” | 0.9” | 1.4” |
| 25 yards | 0.3” | 0.5” | 0.9” | 1.6” | 2.4” |
| 50 yards | 0.5” | 1.0” | 1.7” | 3.1” | 4.7” |
| 100 yards | 1.0” | 2.1” | 3.4” | 6.3” | 9.4” |
Every cell above is computed from that formula, 1.047 x (yards / 100) x MOA, and rounded to the nearest tenth of an inch. None of it is measured, estimated, or copied from a maker’s chart, so you can check any number yourself with a calculator.
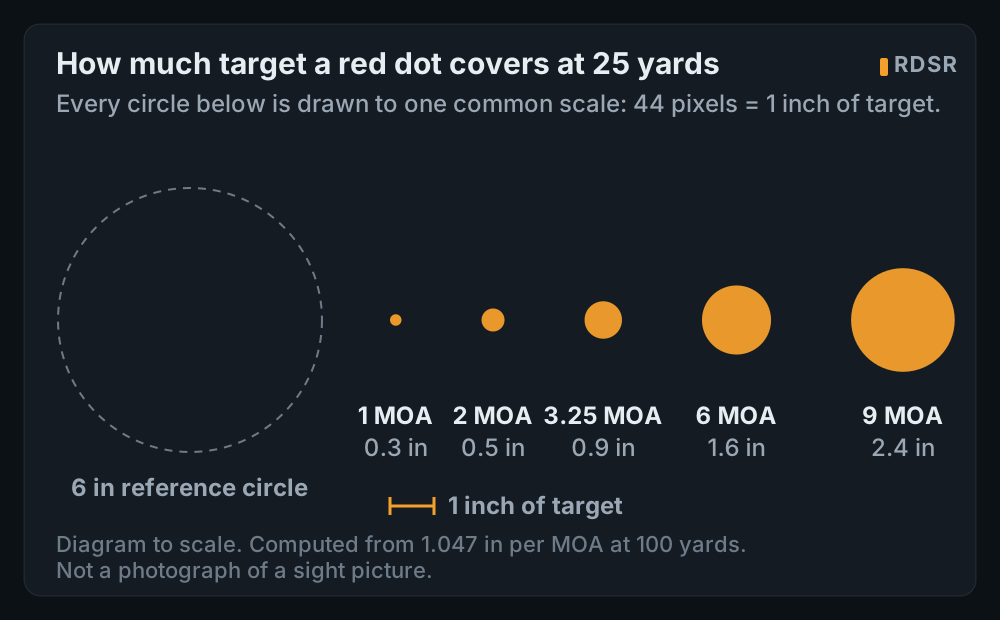
Read that table the way a shooter would. At 25 yards (a realistic defensive pistol distance) even a “huge” 6 MOA dot covers just 1.6 inches, which is fine for combat-accurate hits on a torso. But push that same 6 MOA dot out to 100 yards and it now hides a 6.3-inch circle, easily covering a target’s vital zone or a small steel plate entirely. You cannot aim at what you cannot see, so the dot has eaten your precision.
The 2 MOA dot tells the opposite story. At 100 yards it covers 2.1 inches, leaving the target visible around it so you can aim at a precise spot. The cost shows up close and fast: a small dot is genuinely harder for your eye to locate quickly when you snap the gun up, especially under stress or in poor light. That tension, a small dot for precision at distance, a large dot for speed up close, is the entire decision.
Notice how little the choice costs you up close. At 7 yards the spread between the smallest and largest dot in the table is six tenths of an inch, and at 10 yards it is eight tenths. Dot size is a distance problem, not a close-range one.
2 vs 3.25 vs 6 MOA
With the math in hand, each size sorts into a clear lane.
2 MOA: precision and distance. This is the classic rifle and carbine dot. It stays small enough to aim carefully at 100 yards and beyond without covering the target, and it pairs cleanly with a magnifier (more on that below). The trade-off is acquisition speed: a 2 MOA dot is the slowest of the three to find on a fast presentation, and shooters with astigmatism often struggle to see it crisply. Choose it when your shots are deliberate and your distances are longer. Optics like the Aimpoint Micro T-2 are built around this philosophy.
3.25 MOA: the middle ground. You will see this size (and the closely related 3 MOA) on more sights than any other, and for good reason. It is large enough to find quickly under pressure yet small enough to keep a target visible at moderate range, so it does pistol work, carbine work, and even casual rifle work acceptably. If you only own one red dot and you do not want to optimize for a single narrow task, this is the safe pick. The Trijicon RMR, with its 3.25 MOA dot, is a popular example in this range, and the Leupold DeltaPoint Pro sits close by at 2.5 MOA. (The Holosun 507C, by contrast, ships with a 2 MOA dot, closer to the precision end of the spectrum.)
6 MOA: speed up close. A big dot is the fastest thing to see through the glass. On the draw it jumps into your eye, it is easy to track during recoil and movement, and it shrugs off mild astigmatism better than a small dot does. Because most pistol shooting happens at 25 yards and in, that extra dot coverage rarely costs you a hit. The downside is precision at distance, where 6 MOA simply hides too much target. This is a dedicated close-range defensive choice.
A note on a fourth option: circle-dot reticles sidestep the trade-off. A multi-reticle sight gives you a wide outer ring for fast acquisition plus a small 1 to 3 MOA center dot for precision, at the cost of a slightly busier sight picture and usually a higher price. The sourced ring and dot sizes are in the table further down.
Dots larger than 6 MOA, and who makes them
Every size discussed so far tops out at 6 MOA, and buyers who search for a bigger dot often come away thinking nothing bigger exists. Several makers go further, and one of them goes much further.
Aimpoint Acro P-2, 9 MOA. Aimpoint sells the Acro P-2 in a dedicated 9 MOA configuration, listing a “9 MOA dot size” and describing it as “a professional-grade red dot sight engineered for tactical shotgun applications” (Aimpoint product page, archived capture). Run the formula on that: a 9 MOA dot covers about 2.4 inches of target at 25 yards and about 9.4 inches at 100 yards. That is a dot scaled to a shotgun rib at close range, which is exactly the use Aimpoint scopes it to. Our review covers the 3.5 MOA version of the same sight, the Aimpoint Acro P-2.
Trijicon RMR Type 2 RM07, 6.5 MOA. Trijicon lists the RM07 as a “6.5 MOA Red Dot, Adjustable LED” and gives its reason plainly: “The bigger dot size gives the user the ability to locate the dot quickly which is ideal for close quarter engagements” (Trijicon RM07). Our Trijicon RMR review covers the 3.25 MOA RM06 from the same family.
Sig Romeo3 Max Pro, 8 MOA. The Romeo3 Max Pro is sold in two dot sizes as separate part numbers: the SOR30300 with a 3 MOA dot and the SOR30800 with an 8 MOA dot. An 8 MOA dot covers about 2.1 inches at 25 yards. See our Sig Romeo3 Max Pro review.
C-More, up to 16 MOA. The largest dots we could source from a maker’s own page are C-More’s. The RTS2 is “Available with a 3, 6, 8, 10 or 12 moa dot for use in a wide range of applications” (cmore.com), and the interchangeable diode modules used by its Slide Ride and Railway sights come in “six different sizes; 2, 4, 6, 8, 12, and 16 moa” (cmore.com). A 16 MOA dot covers about 4.2 inches at 25 yards. These are competition sights, sold to shooters who want the dot found instantly on a close, fast stage.
One correction, because the part number invites it: the Trijicon RM09 is not a 9 MOA RMR. Trijicon describes it as “the 1.0 MOA dot in the RM09”, their smallest adjustable-LED dot, and the 09 is a catalog number rather than a size.
Aimpoint publishes its own guidance on picking between sizes. It is worth reading in the maker’s words rather than ours:
“A smaller red dot covers less of the target than a larger one. However, a larger red dot can be advantageous for moving targets.”
“2 MOA The small dot does not obscure the target, even if the target is compact and far away.”
“The 4 MOA red dot could also be a solution if you have difficulties with seeing the smaller 2 MOA dot as round.”
“6 MOA For close and fast-moving targets where the shooter might only get a split second to line up a shot, the 6 MOA dot is the optimal choice. The dot is big, bright, and easy to find encouraging fast target acquisition every time. Perfect for IPSC disciplines, dog handlers, etc.”
Aimpoint, The Red Dot Explained
A big circle is not a big dot
Most of the very large MOA numbers on spec sheets belong to an outer ring, not to the aiming dot, and that is where a lot of the confusion about “8 MOA” and “65 MOA” sights comes from. Here is what the makers actually publish for the common circle-dot sights:
| Sight | Aiming dot | Outer circle |
|---|---|---|
| Holosun 507COMP | 2 MOA | 8, 20 or 32 MOA |
| Holosun 507C X2 | 2 MOA | 32 MOA |
| Holosun 507K X2 | 2 MOA | 32 MOA |
| Meprolight MPO-S | 3 MOA | 33 MOA |
| Sightmark Ultra Shot LQD | 2 MOA | 65 MOA |
| EOTech EXPS3 | 1 or 2 MOA (by reticle) | 68 MOA |
So the 507COMP’s much-quoted 8 MOA is one of its three selectable ring sizes. The dot inside it stays 2 MOA, and 2 MOA is the number that decides how much target you cover when you aim.
Pistol vs rifle
The single biggest factor in your choice is what the optic sits on, because the platform dictates your distances.
For a pistol, lean larger. Defensive and competition pistol work lives inside 25 yards the vast majority of the time, where dot coverage is a non-issue, and speed is everything: finding the dot fast on the draw is the hardest skill for new red dot shooters to learn. A 5 to 6 MOA dot makes that easier. If you also shoot smaller targets, longer distances, or want one optic that does a little of everything, 3 to 3.25 MOA is the sensible compromise that still presents quickly. The Trijicon SRO, available with up to a 5 MOA dot, is a common carry and competition choice at this size, while a 2 MOA optic like the Holosun HE508T is better suited to the precision end of the pistol lineup.
For a rifle or carbine, lean smaller. A 2 MOA dot keeps targets visible out to the distances a rifle is actually used for, and it is the standard for a reason. If your carbine is purely a close-quarters or home-defense gun that never reaches past 50 yards, a 3 to 4 MOA dot or a circle-dot reticle buys you faster acquisition with no meaningful precision penalty. The further and more precisely you shoot, the smaller you want the dot.
Magnifiers push you smaller still. A flip-to-side 3x magnifier behind your red dot magnifies the dot along with the target, so a 6 MOA dot becomes an apparent 18 MOA blob that swallows anything downrange. If you plan to run a magnifier, a 2 MOA dot is the right call, since it stays crisp and usable under magnification.
Astigmatism is the wild card that overrides the chart for some shooters. If a red dot looks like a starburst, comet, or smear to you regardless of its rated size, the MOA number on the box matters less than emitter quality and brightness. Turning the brightness down sharpens the dot for most people, and a larger dot tends to mask the distortion better than a tiny one, so an astigmatic shooter who would otherwise pick 2 MOA may be happier with 3.25 or larger. For severe cases, an etched-reticle optic such as a prism sight is the most reliable fix, since the reticle is physically etched on glass rather than projected light.
The bottom line
MOA is just an angle: about an inch per 100 yards, scaling up or down with distance, describing how much target your dot covers. Once you see it that way the choice is straightforward. Pick 2 MOA for rifles, distance, and anything behind a magnifier. Pick 6 MOA for a dedicated close-range defensive pistol where finding the dot fast matters most. And if you want one dot that does nearly everything well, pick 3 to 3.25 MOA: the reason it outsells every other size is that it refuses to be bad at anything. Match the dot to your distances, and the spec that confused you at checkout becomes the easiest decision on the gun.